A step-by-step guide to creating a complete Pong clone with event handling, game physics, score tracking, and computer-controlled gameplay.
Most of you probably know the Pong game.
If you are from my generation, you probably played it during your childhood on button mobile phones. Even today, it’s one of the best memories from the era of button phones, where Pong was a standard game.
Pong is a simple game consisting of two paddles and a ball. It can be played by two opponents or by a single person against an AI agent. In this article, we will build our own version of the Pong game using Python and its built-in Turtle module, which provides a simple way to draw graphics and dashboards. This tutorial is for beginners as well as programmers who are comfortable with concepts such as OOPS, variables, functions, loops, conditional statements, and module imports.
==========================================
Understanding the Pong Game.
Before building the game, let’s understand its components.
Pong is a two-dimensional table tennis simulation in which two players or a single player competing against an AI agent control the paddles and try to prevent the ball from passing them.
The game should have the following elements.
- Game Window: A game screen where all the objects, such as paddles, the ball, and the score display, can be rendered.
- Paddles: Pong should consist of two paddles positioned on opposite sides of the screen that can move vertically and are controlled through the keyboard.
- Paddle Movement: Players should be able to move their paddles up and down smoothly by using the keyboard keys.
- Ball: The game requires a ball that starts at the center of the screen and moves continuously across the playing area.
- Ball Movement and Bounces: As the ball travels, it must bounce whenever it collides with the top or bottom boundaries of the game window and the paddles.
- Paddle Collisions: When the ball touches a paddle, it should bounce back in the opposite direction.
- Scoring System: If a player fails to intercept the ball and it passes beyond their paddle, the opposing player earns a point.
- Resetting the Ball After a Score: After a point is scored, the ball should return to the center of the screen and begin moving again so the match can continue.
With these mechanics in place, we will have a fully functional Pong game. Let’s get started.
==========================================
Creating the Game Window.
The first step is to create a new Python file. Let’s name it “Dynamic Pong: New Edition”. Then import the necessary modules.
import turtle, time, random
The turtle module is a built-in Python package that allows us to draw shapes, lines, patterns, and animations on a screen using code. It is a tool for visualising one’s code and helps in practicing variables, loops, functions, coordinate systems, and basic game logic with instant visual output. The time library handles time-related functions. The random library on the other hand, is used to generate pseudo-random numbers, allowing programs to select items unpredictably, shuffle data, and simulate probability.
You can refer to the turtle Documentation here.
After importing the libraries, we will create a game window by using the screen() class. It will also create a screen object with various attributes and methods that allow us to customise the appearance and behaviour of the game window.
# Set up the game screen

screen = turtle.Screen()
screen.setup(width=800, height=600)
screen.bgcolor("#121212")  # dark theme
screen.title("Dynamic Pong: New Edition")
screen.tracer(0)

# Keep the window open till explicitly clicked
screen.exitonclick()
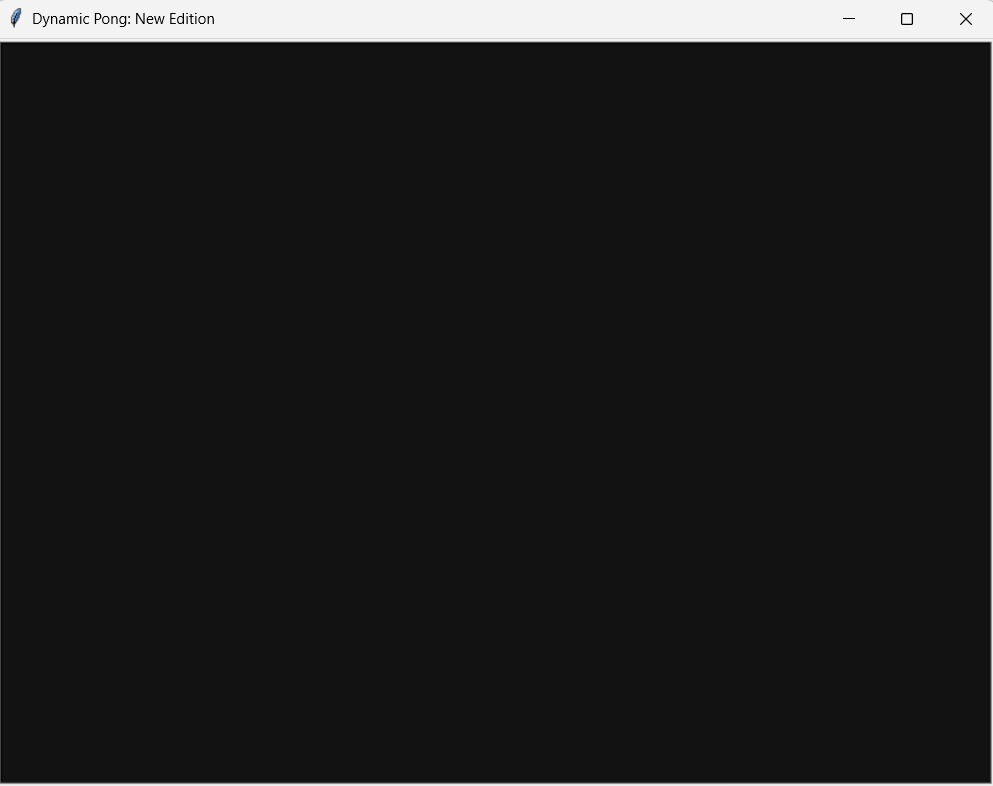
The variables width and height determine the dimensions of the game window. It creates a large 800 × 600 playing area to provide enough space for smooth gameplay, with a background color set as dark black (“#121212”) using the .bgcolor() method. We name the workspace as “Dynamic Pong: New Edition” using the .title() method.
The screen.tracer(0) prevents automatic screen refreshes, stopping the game from looking laggy while multiple objects are removed. It draws everything in the background and only reveals the complete, smooth picture when the screen.update() is called. The .exitonclick() tells our application loop window to remain active on screen until we explicitly click close, avoiding abrupt program termination.
We are now ready with our first step. Run the code, and you will see the game window appear.
==========================================
Creating the Paddles, Ball, and Scoreboard.
In this step, we will add objects to our game. Pong consists of two paddles, a ball, and a scoreboard.
Since several objects share common properties, such as paddles with the same shape, color, and initial position, we will create a helper function called spawn_object to generate these identical entities.
# Helper function to eliminate repetative lines of code
def spawn_object(shape, color, x, y, width_modifier=1, len_modifier=1):
    obj = turtle.Turtle(shape)
    obj.speed(0)  # animation speed set to maximum/instant
    obj.color(color)
    obj.shapesize(stretch_wid=width_modifier, stretch_len=len_modifier)
    obj.penup()   # it prevents drawing lines while moving
    obj.goto(x, y)
    return obj
The helper function eliminates repetitive lines of code. Instead of writing six lines of setup script for every component in our game, we wrap the object creation into a single reusable component.
With the helper function declaring our paddles and ball vector entities can be done by single-line assignments.
# Create game Objects
paddle_a = spawn_object("square", "#00FFCC", -350, 0, width_modifier=5, len_modifier=1)
paddle_b = spawn_object("square", "#FF007F", 350, 0, width_modifier=5, len_modifier=1)
ball = spawn_object("circle", "#FFFF00", 0, 0)
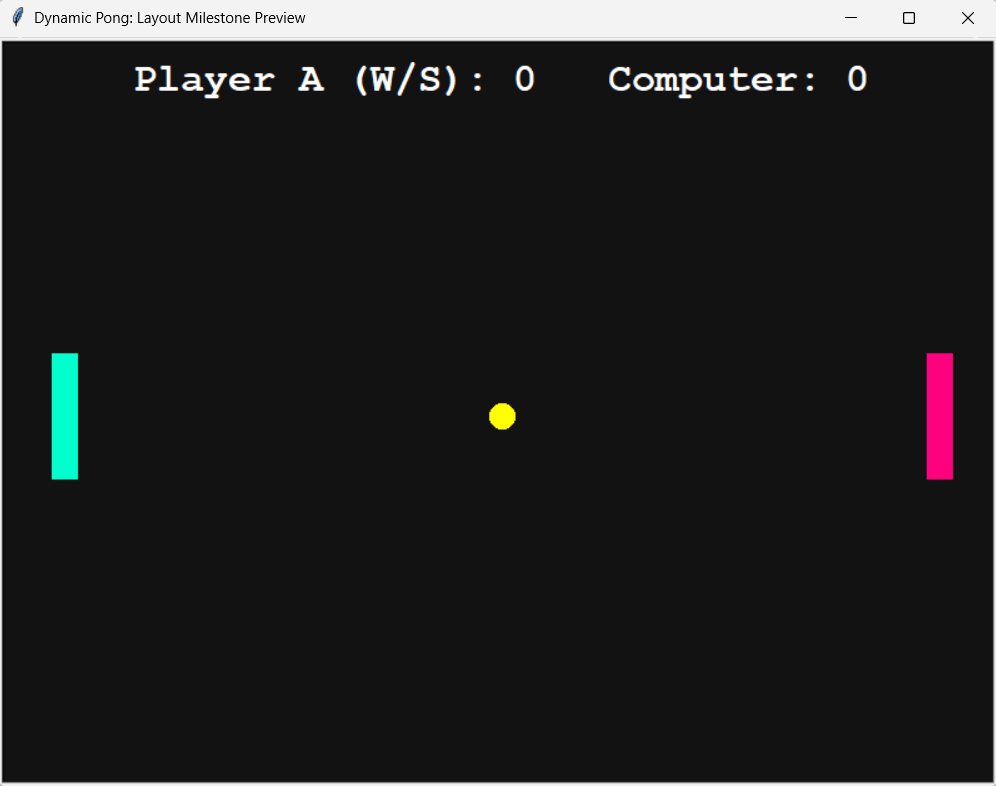
We first initialise the paddles in a base “square” shape, then by using width_modifier = 5 and len_modifier = 1, we can transform the square into an elegant, rectangular paddle. The left paddle is placed at x = -350, the right paddle is placed at x = 350, and the ball starts at the center of the screen (0, 0).
The final step is to add a player score section to track the game status. To achieve this, we leverage our spawn_object function to construct a text renderer named pen. It is positioned at coordinates (0, 250) and functions as a text-rendering engine. We then invoke the .hideturtle() on it to separate the visual presentation of data from raw game physics, allowing for a smooth game flow without any clutter.
# Initialize Game State Scores
score_a = 0
score_b = 0

# Scoreboard text headings initialization
pen = spawn_object("square", "white", 0, 250)
pen.hideturtle()

def draw_score():
    # Clears the previous frame score text and renders updated match data.
    pen.clear()
    pen.write(
        f"Player A (W/S): {score_a}   Computer: {score_b}",
        align="center",
        font=("Courier", 24, "bold")
    )

# Render the initial scoreboard layout on game boot
draw_score()
Once the text render is active pen.clear() function is used to update the live score. It clears any previous score before updating it to a new one, and pen.write() displays the text on the screen.
At this point, all the game components have been initialized and positioned correctly. Run the code to look at our new setup.
==========================================
Tracking the input State.
We will now add the logic to make our paddles functional. If we directly connect the paddles to the keyboard, they will move in a jerky manner because the operating system adds a small delay between repeated key signals. To avoid this issue, we will implement Asynchronous Input State Tracking to track whether a key is being pressed or released; the paddle moves smoothly as long as the player holds a key.
# State dictionary to track continuous hold patterns, bypassing OS delay
keys_pressed = {"w": False, "s": False}

def press_w():   keys_pressed["w"] = True
def release_w(): keys_pressed["w"] = False
def press_s():   keys_pressed["s"] = True
def release_s(): keys_pressed["s"] = False

# Register keyboard mappings
screen.listen()
screen.onkeypress(press_w, "w")
screen.onkeyrelease(release_w, "w")
screen.onkeypress(press_s, "s")
screen.onkeyrelease(release_s, "s")
Instead of moving the paddles directly when a key is hit, we use keyboard events to toggle boolean flags (True or False) inside our keys_pressed dictionary. When the player presses ‘W’, our system marks it as True; when they release it, it switches back to False.
This frees our inputs from operating system lag, allowing our main game loop to read these states on every single cycle and translate them into instant, fluid movement.
==========================================
Implementing the Main Game Loop.
To make our game frames move, we will rely on a fundamental design pattern called the Main Game Loop. This loop runs continuously in the background, performing three major tasks on every single frame refresh ( processing player inputs, updating position coordinates, and rendering the updated scene ).
To implement this engine logic, we initialize an infinite while loop driven by a state flag variable.
game_is_on = True

while game_is_on:
    time.sleep(0.01)  # Small delay to control game speed

    # PLAYER A: continuous asynchronous movement
    if keys_pressed["w"] and paddle_a.ycor() < 240:
        paddle_a.sety(paddle_a.ycor() + PADDLE_SPEED)
    if keys_pressed["s"] and paddle_a.ycor() > -240:
        paddle_a.sety(paddle_a.ycor() - PADDLE_SPEED)

    # projectile mechanics: Recalculate vector steps
    ball.setx(ball.xcor() + ball_dx)
    ball.sety(ball.ycor() + ball_dy)

    screen.update()
The time.sleep(0.01) function slows down the game loop, so the ball moves at a speed our eyes can track. The code then checks the keyboard state during each frame. If player A presses the “W” key, the paddle moves upward, and similarly if the player presses “S”, the paddle moves downward, all the while ensuring that it doesn’t cross the boundary of (y = 240, y = -240). Finally, ball.setx() and ball.sety() constantly adds a small distance to the ball’s position on every single turn of the loop, keeping it gliding smoothly across the screen.
==========================================
Creating the Computer Opponent.
A Pong game would not be very interesting without a challenging opponent. Rather than having two opponents share a single keyboard, we will create an agent that automatically tracks and follows the ball moment. This logic will be placed inside the main game loop so that the agent can make decisions every frame while the game is running.
The logic is simple; if the ball is above the computer paddle, the paddle should move upward. If the ball is below the paddle is should move downward.
Here is the code block that drives the computer’s decision-making loop.
# The AI checks the ball position relative to its center and tracks it smoothly
if paddle_b.ycor() < ball.ycor() and abs(paddle_b.ycor() - ball.ycor()) > 15:
    if paddle_b.ycor() < 240:
        paddle_b.sety(paddle_b.ycor() + 4.0)

elif paddle_b.ycor() > ball.ycor() and abs(paddle_b.ycor() - ball.ycor()) > 15:
    if paddle_b.ycor() > -240:
        paddle_b.sety(paddle_b.ycor() - 4.0)
In the code, we first compare the vertical position of the computer paddle with the vertical position of the ball using the ycor() method, which returns the current y-coordinate of a Turtle object. In the first conditional statement, we check whether the ball is positioned above the computer paddle. If this condition is true, and the distance between the ball and paddle is greater than 15 pixels, the paddle moves upward by 4 pixels using the sety() method. The additional condition paddle_b.ycor() < 240 ensures that the paddle does not move beyond the upper boundary of the game screen.
The elif block performs the opposite operation. If the ball is below the computer paddle and the difference between their positions exceeds 15 pixels, the paddle moves downward by 4 pixels. Similarly, the condition paddle_b.ycor() > -240 prevents the paddle from crossing the lower boundary of the screen.
The abs(paddle_b.ycor() — ball.ycor()) > 15 creates a small dead zone around the paddle’s center. Without this, the agent would make tiny moments even if it was perfectly aligned with the ball, causing jitter.
==========================================
Wall Rebounds
The next part of our game is to make the ball bounce whenever it touches the upper or lower walls of the game window.
To make the ball bounce back, we will continuously monitor the ball’s vertical position using conditional statements, and whenever the ball reaches a predefined boundary, its vertical direction will be reversed, causing it to bounce back into the playing area. To achieve this, we check the ball’s position against the upper and lower limits of the screen. Since our screen spans from -300 to +300 pixels along the vertical y-axis, we check for wall collisions at the 290 and -290 pixel boundaries to account for the thickness of the ball.
# Ceiling and floor rebounds
    if ball.ycor() > 290:
        ball.sety(290)
        ball_dy *= -1
    if ball.ycor() < -290:
        ball.sety(-290)
        ball_dy *= -1
When the ball hits the upper boundary, its position is immediately reset to (y = 290). Similarly, when it reaches the lower boundary (y < -290), it is reset to (y = -290). This prevents the ball from moving outside the visible game area or becoming stuck beyond the screen boundary.
The statement ball_dy *= -1 reverses the ball’s vertical velocity. In mathematical terms, multiplying a positive number by -1 makes it negative, while multiplying a negative number by -1 makes it positive. As a result, an upward-moving ball rebounds back after hitting the wall, and a downward-moving ball rebounds upward, making the ball appear to bounce naturally off the ceiling and floor.
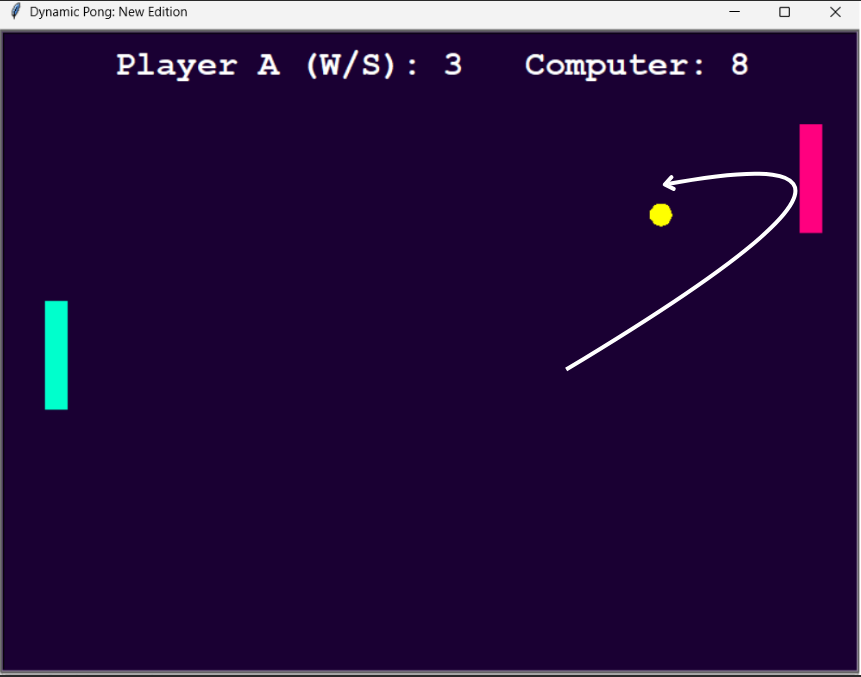
Implementing this logic allows the ball to bounce naturally off the upper and lower walls.
==========================================
Ball–Paddle Collisions.
After making the ball rebound from the wall, our next task is to implement the same logic to the paddles.
    # Right paddle B hit detection
    if (330 < ball.xcor() < 350) and (paddle_b.ycor() - 55 < ball.ycor() < paddle_b.ycor() + 55):
        ball.setx(330)
        ball_dx *= -1
        if abs(ball_dx) < MAX_SPEED:
            ball_dx *= SPEED_INCREMENT
            ball_dy *= SPEED_INCREMENT

    # Left paddle A hit detection
    if (-350 < ball.xcor() < -330) and (paddle_a.ycor() - 55 < ball.ycor() < paddle_a.ycor() + 55):
        ball.setx(-330)
        ball_dx *= -1
        if abs(ball_dx) < MAX_SPEED:
            ball_dx *= SPEED_INCREMENT
            ball_dy *= SPEED_INCREMENT
The program constantly performs a two-step check for both sides of the arena. First, a Horizontal Check verifies if the ball has entered the exact side-lane column where a paddle sits (330 < ball.xcor() < 350 for the right side). Second, a vertical check verifies that the ball’s y-coordinate falls within the paddle’s collision range (paddle_b.ycor() — 55 to paddle_b.ycor() + 55). Since the paddles are stretched vertically, this collision zone closely matches their visible size while also accounting for the ball’s radius.
Whenever both conditions are satisfied, the ball is repositioned just outside the paddle using ball.setx(330) (or ball.setx(-330) for the left paddle). This prevents the ball from becoming embedded inside the paddle. The statement ball_dx *= -1 then reverses the horizontal velocity, sending the ball back toward the opposite side of the screen.
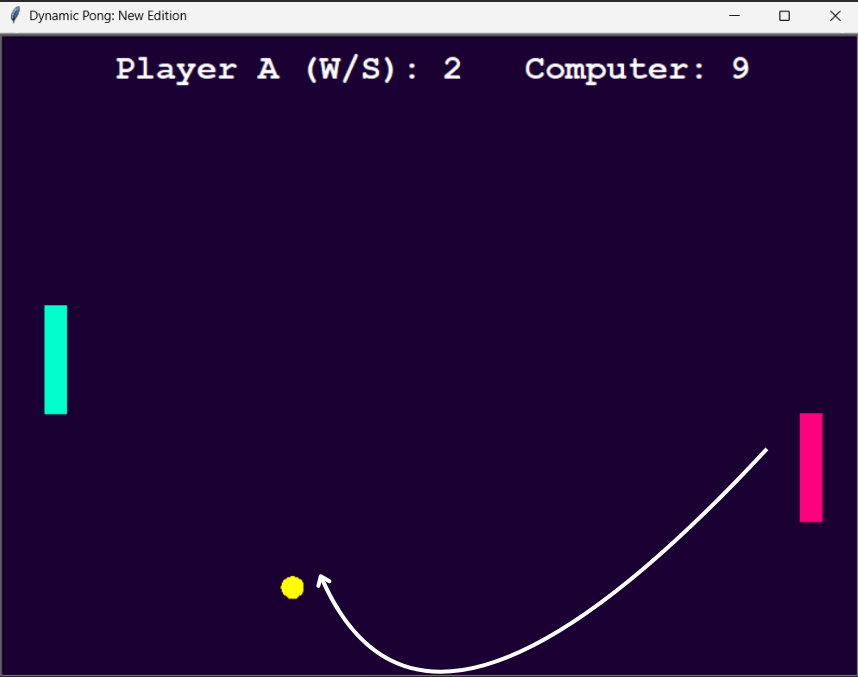
The game also features a speed-scaling mechanism to make it more challenging. After a successful paddle hit, the program checks whether the magnitude of the horizontal velocity (abs(ball_dx)) is still below the maximum allowed speed (MAX_SPEED). If so, both ball_dx and ball_dy are multiplied by SPEED_INCREMENT (1.15), increasing the ball’s speed by 15%. As rallies become longer, the ball moves faster and faster, making each return increasingly difficult and transforming a simple Pong clone into a much more engaging experience.
==========================================
Processing the Score of players.
In the Pong game, a point is awarded when a player fails to intercept the ball and it leaves the playing area. To detect the ball leaving the area, we will monitor its horizontal position in the game loop. Whenever the ball crosses the boundary, we call a function that updates the score, refreshes the display, resets the ball, and prepares the next round.
# SCORE ZONE DETECTIONS
if ball.xcor() > 390:
    trigger_score_event("A")

if ball.xcor() < -390:
    trigger_score_event("B")


def trigger_score_event(winner):
    global score_a, score_b, ball_dx, ball_dy, current_bg_index

    if winner == "A":
        score_a += 1
        direction = -1

        if score_a >= WINNING_SCORE:
            display_game_over("Player A")
            return

    else:
        score_b += 1
        direction = 1

        if score_b >= WINNING_SCORE:
            display_game_over("Computer")
            return

    draw_score()

    # Change background color
    current_bg_index = (current_bg_index + 1) % len(COLORS_POOL)
    screen.bgcolor(COLORS_POOL[current_bg_index])

    # Reset ball position
    ball.goto(0, 0)

    # Start next serve
    ball_dx = INITIAL_SPEED * direction
    ball_dy = INITIAL_SPEED * random.choice([-1, 1])
We first check whether the ball has crossed either scoring boundary. If the ball’s x-coordinate becomes greater than 390, it means the ball has moved beyond the computer’s paddle on the right side of the screen, so Player A is awarded a point. Similarly, if the ball’s x-coordinate becomes less than -390, the ball has passed the player’s paddle on the left side of the screen, and the computer receives a point.
We call the trigger_score_event() to handle all the scoring logic in the main function. It manages the entire scoring process in one place by increasing the score of the winning side using either the score_a or score_b variable. It keeps checking whether either player has reached the winning score limit stored in WINNING_SCORE, and if so, the display_game_over() function is called, and the game ends. The latest scores are displayed on the screen using the draw_score() function. To provide visual feedback, the background color is also changed by selecting the next color from the COLORS_POOL list.
Finally, the next round begins with an unpredictable serve. The ball is automatically directed toward the player who just lost the point, and its vertical launch angle is randomized using random.choice([-1, 1]) so players can never guess exactly where it will go.
==========================================
Adding a Winning Condition and Game Over Screen.
At this point, our Pong game is fully playable. The ball can move, bounce off walls and paddles, and players can score points. However, the game currently runs forever. To make it feel like a complete classic experience, we need to add a winning condition that ends the match once a player reaches the target score. We will also create a dedicated Game Over screen that clearly displays the winner and congratulates them on their victory.
To accomplish this, we will define a function called display_game_over(). This function will be responsible for stopping the game loop, removing the active game objects from the screen, and rendering a final victory message.
def display_game_over(winner_text):
    """Halts the world loop, purges actors, and paints the victory screen."""
    global game_is_on
    game_is_on = False  # Instruct loop to halt execution updates

    # Hide operational gameplay layer items
    ball.hideturtle()
    paddle_a.hideturtle()
    paddle_b.hideturtle()
    pen.clear()

    # Render final vector text layout stack
    screen.bgcolor("#111111")
    end_pen = spawn_object("square", "#FFD700", 0, 40) # Golden yellow color
    end_pen.hideturtle()
    end_pen.write("GAME OVER", align="center", font=("Courier", 44, "bold"))

    end_pen.goto(0, -40)
    end_pen.color("white")
    end_pen.write(f"{winner_text} Wins!", align="center", font=("Courier", 28, "bold"))

    end_pen.goto(0, -100)
    end_pen.color("#00FFCC")
    end_pen.write("Congratulations!", align="center", font=("Courier", 22, "italic"))
    screen.update()
As can be seen in the code above, the first task is to stop the game by setting the variable game_is_on to False. Since our main loop runs under the condition while game_is_on:, changing its value immediately halts all gameplay activity. Next, we hide the ball, both paddles, and clear the scoreboard using the hideturtle() and clear() methods. This removes all gameplay elements from the screen and prepares it for the final display.
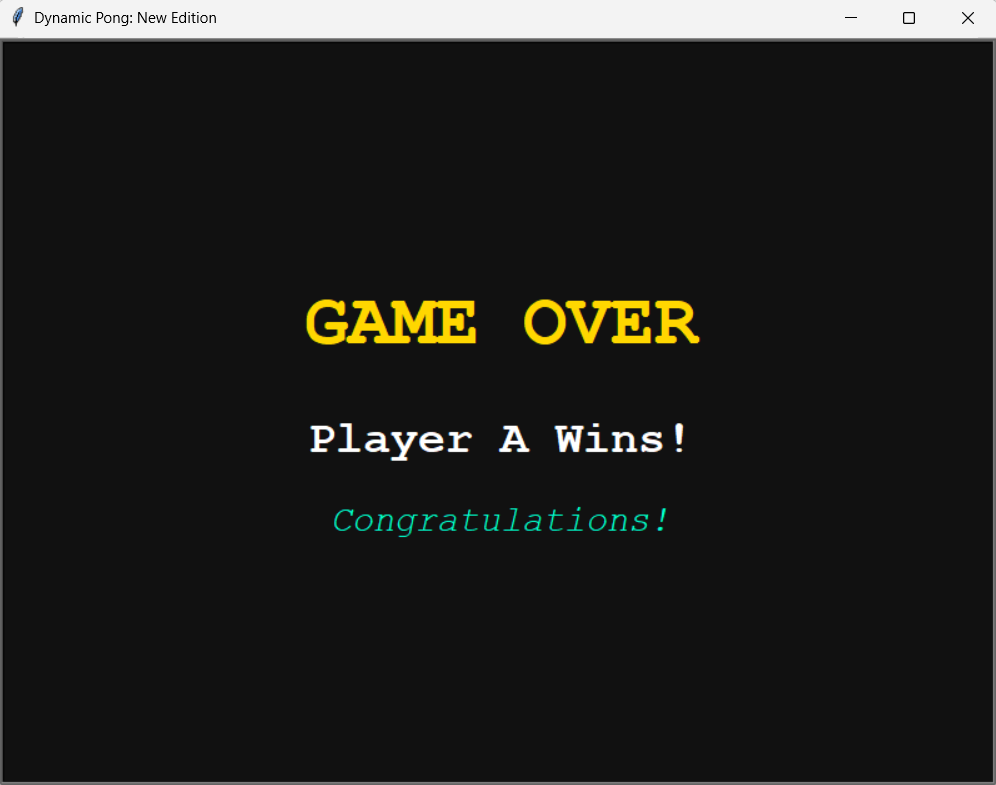
We then customize the ending screen by changing the background color and creating a new Turtle object called end_pen. This object is responsible for displaying the final text messages. Using the write() method, we display a large “GAME OVER” heading, followed by the winner’s name through the winner_text parameter, and finally a congratulatory message.
Lastly, the screen.update() method refreshes the display and renders all of these changes at once. Since we previously disabled automatic screen updates using screen.tracer(0), this step ensures that the Game Over screen becomes visible to the player.
This function is called whenever a player reaches the score specified by the WINNING_SCORE variable, which in our case is 20, providing a clear ending condition for the game.
You can access the complete code for this project directly in my GitHub repository.
Wrapping-UP
In this article, we have built a fully functional Pong game using Python’s Turtle module. Starting with a blank game window, we created paddles, a moving ball, player controls, a computer opponent, collision detection, score tracking, dynamic speed increases, and a game-over system.
I hope you followed along well and tried it out on your own system by accessing our code in the GitHub link provided above.
==========================================
References
[1] Python Software Foundation, turtle — Turtle Graphics. Python 3 Documentation. https://docs.python.org/3/library/turtle.html
[2] Python Software Foundation, time — Time Access and Conversions. Python 3 Documentation. https://docs.python.org/3/library/time.html
[3] Python Software Foundation, random — Generate Pseudo-Random Numbers. Python 3 Documentation. https://docs.python.org/3/library/random.html
[4] Python Software Foundation, The Python Standard Library. Python 3 Documentation. https://docs.python.org/3/library/index.html
[5] Python Software Foundation, Built-in Functions. Python 3 Documentation. https://docs.python.org/3/library/functions.html
==========================================
Connect With Me
Also Read: Phone Numbers to Prompts: AI Changed Our Minds
![]()
Building a Dynamic Pong Game from Scratch. was originally published in UX Planet on Medium, where people are continuing the conversation by highlighting and responding to this story.
A step-by-step guide to creating a complete Pong clone with event handling, game physics, score tracking, and computer-controlled gameplay.Photo by Call Me Fred on UnsplashMost of you probably know the Pong game.If you are from my generation, you probably played it during your childhood on button mobile phones. Even today, it’s one of the best memories from the era of button phones, where Pong was a standard game.Pong is a simple game consisting of two paddles and a ball. It can be played by two opponents or by a single person against an AI agent. In this article, we will build our own version of the Pong game using Python and its built-in Turtle module, which provides a simple way to draw graphics and dashboards. This tutorial is for beginners as well as programmers who are comfortable with concepts such as OOPS, variables, functions, loops, conditional statements, and module imports.==========================================Understanding the Pong Game.Before building the game, let’s understand its components.Pong is a two-dimensional table tennis simulation in which two players or a single player competing against an AI agent control the paddles and try to prevent the ball from passing them.The game should have the following elements.Game Window: A game screen where all the objects, such as paddles, the ball, and the score display, can be rendered.Paddles: Pong should consist of two paddles positioned on opposite sides of the screen that can move vertically and are controlled through the keyboard.Paddle Movement: Players should be able to move their paddles up and down smoothly by using the keyboard keys.Ball: The game requires a ball that starts at the center of the screen and moves continuously across the playing area.Ball Movement and Bounces: As the ball travels, it must bounce whenever it collides with the top or bottom boundaries of the game window and the paddles.Paddle Collisions: When the ball touches a paddle, it should bounce back in the opposite direction.Scoring System: If a player fails to intercept the ball and it passes beyond their paddle, the opposing player earns a point.Resetting the Ball After a Score: After a point is scored, the ball should return to the center of the screen and begin moving again so the match can continue.With these mechanics in place, we will have a fully functional Pong game. Let’s get started.==========================================Creating the Game Window.The first step is to create a new Python file. Let’s name it “Dynamic Pong: New Edition”. Then import the necessary modules.import turtle, time, randomThe turtle module is a built-in Python package that allows us to draw shapes, lines, patterns, and animations on a screen using code. It is a tool for visualising one’s code and helps in practicing variables, loops, functions, coordinate systems, and basic game logic with instant visual output. The time library handles time-related functions. The random library on the other hand, is used to generate pseudo-random numbers, allowing programs to select items unpredictably, shuffle data, and simulate probability.You can refer to the turtle Documentation here.After importing the libraries, we will create a game window by using the screen() class. It will also create a screen object with various attributes and methods that allow us to customise the appearance and behaviour of the game window.# Set up the game screenscreen = turtle.Screen()screen.setup(width=800, height=600)screen.bgcolor(“#121212”) # dark themescreen.title(“Dynamic Pong: New Edition”)screen.tracer(0)# Keep the window open till explicitly clickedscreen.exitonclick()The variables width and height determine the dimensions of the game window. It creates a large 800 × 600 playing area to provide enough space for smooth gameplay, with a background color set as dark black (“#121212”) using the .bgcolor() method. We name the workspace as “Dynamic Pong: New Edition” using the .title() method.The screen.tracer(0) prevents automatic screen refreshes, stopping the game from looking laggy while multiple objects are removed. It draws everything in the background and only reveals the complete, smooth picture when the screen.update() is called. The .exitonclick() tells our application loop window to remain active on screen until we explicitly click close, avoiding abrupt program termination.We are now ready with our first step. Run the code, and you will see the game window appear.The game Window created by the code. (Image by Author)==========================================Creating the Paddles, Ball, and Scoreboard.In this step, we will add objects to our game. Pong consists of two paddles, a ball, and a scoreboard.Since several objects share common properties, such as paddles with the same shape, color, and initial position, we will create a helper function called spawn_object to generate these identical entities.# Helper function to eliminate repetative lines of codedef spawn_object(shape, color, x, y, width_modifier=1, len_modifier=1): obj = turtle.Turtle(shape) obj.speed(0) # animation speed set to maximum/instant obj.color(color) obj.shapesize(stretch_wid=width_modifier, stretch_len=len_modifier) obj.penup() # it prevents drawing lines while moving obj.goto(x, y) return objThe helper function eliminates repetitive lines of code. Instead of writing six lines of setup script for every component in our game, we wrap the object creation into a single reusable component.With the helper function declaring our paddles and ball vector entities can be done by single-line assignments.# Create game Objects paddle_a = spawn_object(“square”, “#00FFCC”, -350, 0, width_modifier=5, len_modifier=1)paddle_b = spawn_object(“square”, “#FF007F”, 350, 0, width_modifier=5, len_modifier=1)ball = spawn_object(“circle”, “#FFFF00”, 0, 0)We first initialise the paddles in a base “square” shape, then by using width_modifier = 5 and len_modifier = 1, we can transform the square into an elegant, rectangular paddle. The left paddle is placed at x = -350, the right paddle is placed at x = 350, and the ball starts at the center of the screen (0, 0).The final step is to add a player score section to track the game status. To achieve this, we leverage our spawn_object function to construct a text renderer named pen. It is positioned at coordinates (0, 250) and functions as a text-rendering engine. We then invoke the .hideturtle() on it to separate the visual presentation of data from raw game physics, allowing for a smooth game flow without any clutter.# Initialize Game State Scoresscore_a = 0score_b = 0# Scoreboard text headings initializationpen = spawn_object(“square”, “white”, 0, 250)pen.hideturtle()def draw_score(): # Clears the previous frame score text and renders updated match data. pen.clear() pen.write( f”Player A (W/S): {score_a} Computer: {score_b}”, align=”center”, font=(“Courier”, 24, “bold”) )# Render the initial scoreboard layout on game bootdraw_score()Once the text render is active pen.clear() function is used to update the live score. It clears any previous score before updating it to a new one, and pen.write() displays the text on the screen.At this point, all the game components have been initialized and positioned correctly. Run the code to look at our new setup.The game screen after we update it with all the components like paddle, ball, etc. (Image by Author)==========================================Tracking the input State.We will now add the logic to make our paddles functional. If we directly connect the paddles to the keyboard, they will move in a jerky manner because the operating system adds a small delay between repeated key signals. To avoid this issue, we will implement Asynchronous Input State Tracking to track whether a key is being pressed or released; the paddle moves smoothly as long as the player holds a key.# State dictionary to track continuous hold patterns, bypassing OS delaykeys_pressed = {“w”: False, “s”: False}def press_w(): keys_pressed[“w”] = Truedef release_w(): keys_pressed[“w”] = Falsedef press_s(): keys_pressed[“s”] = Truedef release_s(): keys_pressed[“s”] = False# Register keyboard mappingsscreen.listen()screen.onkeypress(press_w, “w”)screen.onkeyrelease(release_w, “w”)screen.onkeypress(press_s, “s”)screen.onkeyrelease(release_s, “s”)Instead of moving the paddles directly when a key is hit, we use keyboard events to toggle boolean flags (True or False) inside our keys_pressed dictionary. When the player presses ‘W’, our system marks it as True; when they release it, it switches back to False.This frees our inputs from operating system lag, allowing our main game loop to read these states on every single cycle and translate them into instant, fluid movement.==========================================Implementing the Main Game Loop.To make our game frames move, we will rely on a fundamental design pattern called the Main Game Loop. This loop runs continuously in the background, performing three major tasks on every single frame refresh ( processing player inputs, updating position coordinates, and rendering the updated scene ).To implement this engine logic, we initialize an infinite while loop driven by a state flag variable.game_is_on = Truewhile game_is_on: time.sleep(0.01) # Small delay to control game speed # PLAYER A: continuous asynchronous movement if keys_pressed[“w”] and paddle_a.ycor() < 240: paddle_a.sety(paddle_a.ycor() + PADDLE_SPEED) if keys_pressed[“s”] and paddle_a.ycor() > -240: paddle_a.sety(paddle_a.ycor() – PADDLE_SPEED) # projectile mechanics: Recalculate vector steps ball.setx(ball.xcor() + ball_dx) ball.sety(ball.ycor() + ball_dy) screen.update()The time.sleep(0.01) function slows down the game loop, so the ball moves at a speed our eyes can track. The code then checks the keyboard state during each frame. If player A presses the “W” key, the paddle moves upward, and similarly if the player presses “S”, the paddle moves downward, all the while ensuring that it doesn’t cross the boundary of (y = 240, y = -240). Finally, ball.setx() and ball.sety() constantly adds a small distance to the ball’s position on every single turn of the loop, keeping it gliding smoothly across the screen.==========================================Creating the Computer Opponent.A Pong game would not be very interesting without a challenging opponent. Rather than having two opponents share a single keyboard, we will create an agent that automatically tracks and follows the ball moment. This logic will be placed inside the main game loop so that the agent can make decisions every frame while the game is running.The logic is simple; if the ball is above the computer paddle, the paddle should move upward. If the ball is below the paddle is should move downward.Here is the code block that drives the computer’s decision-making loop.# The AI checks the ball position relative to its center and tracks it smoothlyif paddle_b.ycor() < ball.ycor() and abs(paddle_b.ycor() – ball.ycor()) > 15: if paddle_b.ycor() < 240: paddle_b.sety(paddle_b.ycor() + 4.0)elif paddle_b.ycor() > ball.ycor() and abs(paddle_b.ycor() – ball.ycor()) > 15: if paddle_b.ycor() > -240: paddle_b.sety(paddle_b.ycor() – 4.0)In the code, we first compare the vertical position of the computer paddle with the vertical position of the ball using the ycor() method, which returns the current y-coordinate of a Turtle object. In the first conditional statement, we check whether the ball is positioned above the computer paddle. If this condition is true, and the distance between the ball and paddle is greater than 15 pixels, the paddle moves upward by 4 pixels using the sety() method. The additional condition paddle_b.ycor() < 240 ensures that the paddle does not move beyond the upper boundary of the game screen.The elif block performs the opposite operation. If the ball is below the computer paddle and the difference between their positions exceeds 15 pixels, the paddle moves downward by 4 pixels. Similarly, the condition paddle_b.ycor() > -240 prevents the paddle from crossing the lower boundary of the screen.The abs(paddle_b.ycor() — ball.ycor()) > 15 creates a small dead zone around the paddle’s center. Without this, the agent would make tiny moments even if it was perfectly aligned with the ball, causing jitter.==========================================Wall ReboundsThe next part of our game is to make the ball bounce whenever it touches the upper or lower walls of the game window.To make the ball bounce back, we will continuously monitor the ball’s vertical position using conditional statements, and whenever the ball reaches a predefined boundary, its vertical direction will be reversed, causing it to bounce back into the playing area. To achieve this, we check the ball’s position against the upper and lower limits of the screen. Since our screen spans from -300 to +300 pixels along the vertical y-axis, we check for wall collisions at the 290 and -290 pixel boundaries to account for the thickness of the ball.# Ceiling and floor rebounds if ball.ycor() > 290: ball.sety(290) ball_dy *= -1 if ball.ycor() < -290: ball.sety(-290) ball_dy *= -1When the ball hits the upper boundary, its position is immediately reset to (y = 290). Similarly, when it reaches the lower boundary (y < -290), it is reset to (y = -290). This prevents the ball from moving outside the visible game area or becoming stuck beyond the screen boundary.The statement ball_dy *= -1 reverses the ball’s vertical velocity. In mathematical terms, multiplying a positive number by -1 makes it negative, while multiplying a negative number by -1 makes it positive. As a result, an upward-moving ball rebounds back after hitting the wall, and a downward-moving ball rebounds upward, making the ball appear to bounce naturally off the ceiling and floor.Implementing this logic allows the ball to bounce naturally off the upper and lower walls.Image showing the ball naturally bouncing off the upper and lower walls. (Image by Author)==========================================Ball–Paddle Collisions.After making the ball rebound from the wall, our next task is to implement the same logic to the paddles. # Right paddle B hit detection if (330 < ball.xcor() < 350) and (paddle_b.ycor() – 55 < ball.ycor() < paddle_b.ycor() + 55): ball.setx(330) ball_dx *= -1 if abs(ball_dx) < MAX_SPEED: ball_dx *= SPEED_INCREMENT ball_dy *= SPEED_INCREMENT # Left paddle A hit detection if (-350 < ball.xcor() < -330) and (paddle_a.ycor() – 55 < ball.ycor() < paddle_a.ycor() + 55): ball.setx(-330) ball_dx *= -1 if abs(ball_dx) < MAX_SPEED: ball_dx *= SPEED_INCREMENT ball_dy *= SPEED_INCREMENTThe program constantly performs a two-step check for both sides of the arena. First, a Horizontal Check verifies if the ball has entered the exact side-lane column where a paddle sits (330 < ball.xcor() < 350 for the right side). Second, a vertical check verifies that the ball’s y-coordinate falls within the paddle’s collision range (paddle_b.ycor() — 55 to paddle_b.ycor() + 55). Since the paddles are stretched vertically, this collision zone closely matches their visible size while also accounting for the ball’s radius.Whenever both conditions are satisfied, the ball is repositioned just outside the paddle using ball.setx(330) (or ball.setx(-330) for the left paddle). This prevents the ball from becoming embedded inside the paddle. The statement ball_dx *= -1 then reverses the horizontal velocity, sending the ball back toward the opposite side of the screen.The game also features a speed-scaling mechanism to make it more challenging. After a successful paddle hit, the program checks whether the magnitude of the horizontal velocity (abs(ball_dx)) is still below the maximum allowed speed (MAX_SPEED). If so, both ball_dx and ball_dy are multiplied by SPEED_INCREMENT (1.15), increasing the ball’s speed by 15%. As rallies become longer, the ball moves faster and faster, making each return increasingly difficult and transforming a simple Pong clone into a much more engaging experience.Ball bouncing back whenever it hits the paddle. (Image by Author)==========================================Processing the Score of players.In the Pong game, a point is awarded when a player fails to intercept the ball and it leaves the playing area. To detect the ball leaving the area, we will monitor its horizontal position in the game loop. Whenever the ball crosses the boundary, we call a function that updates the score, refreshes the display, resets the ball, and prepares the next round.# SCORE ZONE DETECTIONS if ball.xcor() > 390: trigger_score_event(“A”)if ball.xcor() < -390: trigger_score_event(“B”)def trigger_score_event(winner): global score_a, score_b, ball_dx, ball_dy, current_bg_index if winner == “A”: score_a += 1 direction = -1 if score_a >= WINNING_SCORE: display_game_over(“Player A”) return else: score_b += 1 direction = 1 if score_b >= WINNING_SCORE: display_game_over(“Computer”) return draw_score() # Change background color current_bg_index = (current_bg_index + 1) % len(COLORS_POOL) screen.bgcolor(COLORS_POOL[current_bg_index]) # Reset ball position ball.goto(0, 0) # Start next serve ball_dx = INITIAL_SPEED * direction ball_dy = INITIAL_SPEED * random.choice([-1, 1])We first check whether the ball has crossed either scoring boundary. If the ball’s x-coordinate becomes greater than 390, it means the ball has moved beyond the computer’s paddle on the right side of the screen, so Player A is awarded a point. Similarly, if the ball’s x-coordinate becomes less than -390, the ball has passed the player’s paddle on the left side of the screen, and the computer receives a point.We call the trigger_score_event() to handle all the scoring logic in the main function. It manages the entire scoring process in one place by increasing the score of the winning side using either the score_a or score_b variable. It keeps checking whether either player has reached the winning score limit stored in WINNING_SCORE, and if so, the display_game_over() function is called, and the game ends. The latest scores are displayed on the screen using the draw_score() function. To provide visual feedback, the background color is also changed by selecting the next color from the COLORS_POOL list.Finally, the next round begins with an unpredictable serve. The ball is automatically directed toward the player who just lost the point, and its vertical launch angle is randomized using random.choice([-1, 1]) so players can never guess exactly where it will go.==========================================Adding a Winning Condition and Game Over Screen.At this point, our Pong game is fully playable. The ball can move, bounce off walls and paddles, and players can score points. However, the game currently runs forever. To make it feel like a complete classic experience, we need to add a winning condition that ends the match once a player reaches the target score. We will also create a dedicated Game Over screen that clearly displays the winner and congratulates them on their victory.To accomplish this, we will define a function called display_game_over(). This function will be responsible for stopping the game loop, removing the active game objects from the screen, and rendering a final victory message.def display_game_over(winner_text): “””Halts the world loop, purges actors, and paints the victory screen.””” global game_is_on game_is_on = False # Instruct loop to halt execution updates # Hide operational gameplay layer items ball.hideturtle() paddle_a.hideturtle() paddle_b.hideturtle() pen.clear() # Render final vector text layout stack screen.bgcolor(“#111111”) end_pen = spawn_object(“square”, “#FFD700”, 0, 40) # Golden yellow color end_pen.hideturtle() end_pen.write(“GAME OVER”, align=”center”, font=(“Courier”, 44, “bold”)) end_pen.goto(0, -40) end_pen.color(“white”) end_pen.write(f”{winner_text} Wins!”, align=”center”, font=(“Courier”, 28, “bold”)) end_pen.goto(0, -100) end_pen.color(“#00FFCC”) end_pen.write(“Congratulations!”, align=”center”, font=(“Courier”, 22, “italic”)) screen.update()As can be seen in the code above, the first task is to stop the game by setting the variable game_is_on to False. Since our main loop runs under the condition while game_is_on:, changing its value immediately halts all gameplay activity. Next, we hide the ball, both paddles, and clear the scoreboard using the hideturtle() and clear() methods. This removes all gameplay elements from the screen and prepares it for the final display.We then customize the ending screen by changing the background color and creating a new Turtle object called end_pen. This object is responsible for displaying the final text messages. Using the write() method, we display a large “GAME OVER” heading, followed by the winner’s name through the winner_text parameter, and finally a congratulatory message.Lastly, the screen.update() method refreshes the display and renders all of these changes at once. Since we previously disabled automatic screen updates using screen.tracer(0), this step ensures that the Game Over screen becomes visible to the player.This function is called whenever a player reaches the score specified by the WINNING_SCORE variable, which in our case is 20, providing a clear ending condition for the game.Image showing the Winning Message. (Image by Author)You can access the complete code for this project directly in my GitHub repository.Wrapping-UPIn this article, we have built a fully functional Pong game using Python’s Turtle module. Starting with a blank game window, we created paddles, a moving ball, player controls, a computer opponent, collision detection, score tracking, dynamic speed increases, and a game-over system.I hope you followed along well and tried it out on your own system by accessing our code in the GitHub link provided above.==========================================References[1] Python Software Foundation, turtle — Turtle Graphics. Python 3 Documentation. https://docs.python.org/3/library/turtle.html[2] Python Software Foundation, time — Time Access and Conversions. Python 3 Documentation. https://docs.python.org/3/library/time.html[3] Python Software Foundation, random — Generate Pseudo-Random Numbers. Python 3 Documentation. https://docs.python.org/3/library/random.html[4] Python Software Foundation, The Python Standard Library. Python 3 Documentation. https://docs.python.org/3/library/index.html[5] Python Software Foundation, Built-in Functions. Python 3 Documentation. https://docs.python.org/3/library/functions.html==========================================Connect With MeLinkedINAlso Read: Phone Numbers to Prompts: AI Changed Our MindsBuilding a Dynamic Pong Game from Scratch. was originally published in UX Planet on Medium, where people are continuing the conversation by highlighting and responding to this story. python-programming, programming, python, design, python-libraries


